And now for the technique! Some recipes call for "aging" your egg whites but I have found no benefit of this. It is however helpful if they are at room temperature because they'll whip better. And no, no packaged egg whites. Once your eggs are separated and weighed, set them aside while you get everything else ready.
Grind pumpkin seeds or sunflower seeds in a blender or with a food processor.
Sift with a fine mesh sifter. If you have more than a Tablespoon or two of clumps left regrind.
Sift pumpkin seed flour with powdered sugar and cocoa powder (if chocolate shells are desired) into a large bowl. Set aside.
Use a stand mixer or a hand mixer and another large bowl, beat egg whites until frothy then add the granulated sugar.
Be sure your bowl is super clean to get a stiff peak! If you find this step tricky use a hand mixer so you can keep a closer eye on it. Continue beating to stiff peaks.
Add stiff egg whites to bowl with dry mix. Mix together until combined. No need to fold.
Now comes the “macaronage” step. Using a bowl scraper or spatula, push the mixture against the side of the bowl for several minutes.
This step can be tricky but once you get it you won't have issues. It's finding that just right balance. My first few batches I kept under mixing.
At this point add gel or powdered food coloring if you want a colored shell. No liquid coloring.
You can also use a bowl scraper to push the batter against the sides of the bowl. I found personally I like using a spoon better but try it and see what you like. The point of this step is to partially deflate that meringue. I know, weird. This goes against bakers instinct! You worked to make that meringue stiff and know you're pushing the air out of it!
You know it’s done when you can do the “figure 8 test”. When the batter flows off of the spatula allowing you to make a figure 8. If it falls off in big clumps and doesn’t “flow like lava” you need to continue the macaronage step.
Fit a pastry bag with a round tip (or do as I do. Just use a disposable pastry bag and snip the end off, no tip.) Fill the bag and pipe onto parchment lined trays (remember, no silicone here!).
I usually make small or medium macs, so hold your pastry bag straight and push some batter out until you make a circle about 1 ½ inches across (or make larger ones if you desire).
I count to 3 then flip the pastry bag up. Continue to fill tray, leaving a couple inches between each cookie.
Once you have a full tray tap on the counter 3-5 times. If at this point your macs still have a raised point in the middle you haven't done the "macaronage" step enough. By the time you've gotten to end of the tray they should have settled. You can scrape them all back in your bowl and continue the macaronage a bit more.
If desired you can now sprinkle the tops with sprinkles or edible glitter.
Continue with additional trays until done. Let rest on the counter for 15 minutes. Many recipes call for a longer rest but I haven't found much benefit of this.
Bake at 250 degrees for 15 to 20 minutes or longer for larger macs (If you have convection you can bake at 275) on the middle rack. Don't open the oven while baking. This is what works in my ovens. I suggest piping a small number of macs on a couple of trays to experiment. It won't harm the other trays of macs to sit on the counter waiting longer while you experiment. Each oven is so different!
I actually only bake them in my convection oven because they turn out better. If you don't have convection lower the temperature to 250. At least for my oven, that's what works!
Add a couple minutes for larger macs. Until you get the hang of it break one open before removing tray and make sure it isn’t liquidy inside. Overbaking slightly is better than underbaking. They shouldn’t be browned but you want to see little “feet” where the macs have risen up.
Let cool.
Match up macs in pairs that are the same size.
Pipe filling on half the macs then top with another.
If using a filling and frosting, pipe the outer frosting then add a dollop of inner filling.
Place in covered airtight container and chill for at least 24 hours. This allows the filling to soften the macs just a little and they will have a much chewier texture. It's amazing how much better they taste a day or 2 later!
To flavor Macarons:
Save it for the filling! I haven't found adding flavoring to the shells works well. You'll be messing with the balance and they are neutral enough in flavor you can just color them if desired to match the flavor of the filling. Cocoa powder does work well though and I have done vanilla bean and lime juice powder fine. Personally unless I'm using cocoa powder for chocolate I just go with plain.
To decorate macarons:
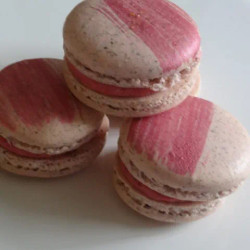
I love the natural speckled color of the macarons but I have started adding pastel coloring. They remind me of bird eggs. Just be sure to use gel or powdered food coloring. Before the rest phase the tops can be sprinkled with sprinkles of all kinds, edible glitters, stars, you name it.
After baking you can paint tops by brushing with gel food coloring thinned a little with a clear extract.
Pearl dust, luster dust, and the like can be applied by mixing with a tiny bit of clear extracts.
Filling Macarons:
Make sure the buttercream or frosting you use to fill them isn't TOO soft. You don't want it to fall out the sides when someone takes a bite!
I like using a basic american powdered sugar frosting and adding different flavors to that or a ganache is good too. Or you can use a jam or ganache in the middle and a ring of frosting around the edge.
Storing Macarons:
Store filled macarons in an airtight container in the refrigerator for 4-5 days. They are best after 1-2 days.
I have had great success freezing macs either prefilled or just the shells for up to a couple months. They thaw within an hour or so if you pop them in the fridge. Just make sure to use a container that will protect them as they are fragile.