 Sort ingredients
 helen
helen QR Code
 Listen
 Pdf
Pdf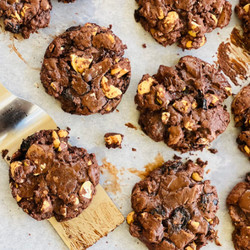
Position the racks to divide the oven into thirds and preheat it to 325 degrees F. (If your oven has hot spots, center the rack and bake one sheet at a time because it’s best not to have to open the oven and take the time to rotate the sheets during the short bake.)
Line two baking sheets with parchment paper or silicone baking mats. Cover the bottom of a flat-bottomed jar or glass with plastic wrap.
Put the cherries in a bowl, cover with very hot tap water and let soak while you put together the rest of the ingredients. When you’re ready for them, drain and pat dry between paper towels.
Whisk the flour, cocoa, salt and baking powder together.
Put the butter in a medium heatproof bowl. Scatter over 7 ounces of the bittersweet chocolate and place the bowl over a saucepan of water; the bottom of the bowl shouldn’t touch the water. Bring the water to a gentle simmer and slowly melt the butter and chocolate; stir occasionally and be careful not to overheat the mixture — you don’t want the chocolate and butter to get so hot that they separate.
Toss the remaining 6 ounces bittersweet chocolate, the cashews, milk chocolate and cherries together in another bowl.
Working with a stand mixer fitted with the whisk attachment, or in a large bowl with a hand mixer, beat the eggs and sugar together on medium-high speed for about 5 minutes (don’t skimp on the time), until the eggs are pale & the whisk leaves tracks. Beat in the vanilla. With the mixer on medium-low, scrape in the warm melted butter and chocolate and mix just until incorporated.
Switch to a sturdy flexible spatula and, as gently as you can with this heavy batter, fold in the flour mixture, making certain that you get to anything that’s at the bottom of the bowl. 9.When almost all of the dry ingredients are incorporated, add the chopped chocolate, nuts and cherries, folding and stirring until they’re mixed in. (Everything will be chocolate-covered except the cashews; their oil makes them somewhat resistant to coating.)
Using a large cookie scoop, scoop out level portions of the warm dough or use a tablespoon to get rounded spoonfuls, placing the mounds of dough about 2 inches apart on the baking sheets. Use the bottom of the jar to lightly press down on each mound — you’re aiming to get a puck with a diameter of 2 ½ inches.
Bake the cookies for 11 minutes, or until the tops, which will crack, are mostly dry — the centers might look wet and unbaked. The cookies will still be very soft: Go by time and have faith. Transfer the baking sheets to a rack and let cookies cool and set for about 30 minutes, until you can lift them from the parchment paper. The cookies really shouldn’t be budged when they’re still soft. (If you haven’t done so, bake the second sheet as soon as you’ve taken the first sheet out of the oven.)
STORING: The flattened cookie dough can be frozen for up to 2 months. Do not defrost before baking; just add another 1 minute to the baking time. The cookies are at their most splendid the day they’re made. In fact, nothing beats a Chunker that’s just a couple of hours out of the oven. However, they’ll keep covered at room temperature for about 2 days. And they can be frozen, well wrapped, for 1 month; thaw in the wrapper.