 Sort ingredients
 mojopie
 QR Code
 Listen
 Pdf
Pdf
Start by brewing your espresso. If you have a grinder at home, I did 18g of fresh beans, and then extracted 50g of espresso. So in total I needed 4 shots. This ratio of bean to coffee is a little higher than normal, but the intensity of flavour is just right!
Into a small bowl, whisk together the sugar, dextrose, skimmed milk powder and ice cream stabiliser. Set this to one side.
Add the glucose syrup, milk, cream and espresso to a medium saucepan. Place it over a medium heat.
Cook the mixture to 45C/113F, then add in the sugar mixture, and whisk constantly, until it reaches 85C/185F on a digital thermometer.
Remove it from the heat and pour it into a tall measuring jug. Blend for 30 seconds with a hand blender.
I find adding the mixture into a vacuum bag for food is a really efficient way to cool and store the gelato base, placing it in a large bowl of ice water to chill for 15 minutes. If you don't have one, simply pour the mixture into a large bowl, and stir it every few minutes in a sink full of ice water for about 15 minutes, then cover the surface with clingfilm and refrigerate for a minimum of 12 hours.
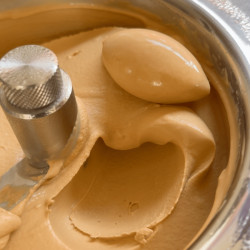
The next day, remove it from the fridge and pour it straight into your gelato or ice cream maker - do not blend it before pouring it in. Note - the amount of time it takes for your mixture to churn will depend on your machine so follow the manufacturer's guidelines. The machine I use is a Musso Lussino 4080.
Once churned it can be eaten straight away or stored in a container and kept in the freezer. Note – the longer the mixture is kept in the freezer, the more the texture will deteriorate as water molecules form larger ice crystals. For the best texture, it’s best to churn and serve it the same day.