Filter the milk by pouring it into a strainer over a large pot.
Add the whey by slowly pouring it into the strained milk, then gently whisk until fully combined.
While you’re mixing, slowly heat the milk until it reaches 40°C (or 104°F). Check this using your thermometer.
Mix one scoop of powdered calf rennet into a small cup of water until it fully dissolves.
Slowly pour the rennet mixture into the warm milk, gently whisking until combined.
Next slowly stir the milk in the opposite direction and let it sit until it becomes coagulated, forming a curd-like consistency.
To start breaking your curd, cut it into large squares within the pot.
Wait about 15 minutes until your curd is fully separated from the liquid. You'll be able to tell by the color of the whey, which turns yellow as it acidifies. The curd will remain vibrant white.
While the curd is still warm, break it by gently using your whisk to stir the mixture, slowly separating large chunks of curd from the liquid.
Scrape the sides of the pot to remove any curd that might have gotten stuck.
Usually, the curd will fall to the bottom of the pot. You can form it into one large mass by reaching in with your hands, squeezing the curd back together and removing any excess liquid.
Allow your curd to sit in the pot for 8 - 12 hours. Net, remove it from its liquid and gently squeeze out any moisture, before placing it onto a baking sheet.
Add a few dashes of salt and begin slicing your curd with a knife, checking to make sure there are visible holes from the fermentation process.
Continue shredding your curd by hand until it’s broken down into small chunks.
Place these into a large pot and add two large handfuls of salt, mixing together.
To start the stretching process, pour boiling water around the edges of the curd rather than right on top of it. Stir together until the dough begins to melt.
As the dough is melting, use a set of wooden spoons to blend it together, making it into a large lump and stretching it out thoroughly.
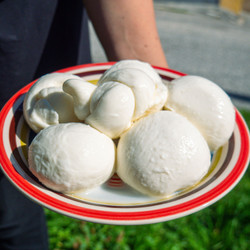
Once it’s been stretched out, start breaking your curd into fist-sized balls. Then, place them in a pot of brine.
Your mozzarella is now ready to be devoured!
If you want to preserve your freshly made mozzarella for future cooking, just add your cheese curds to a small container with the leftover brine and whey mixtures. Then, you can have homemade mozzarella anytime!
