 Sort ingredients
 gigilizgigi
 QR Code
 Listen
 Pdf
Pdf
Whisk the milk, yeast, and granulated sugar together in the bowl of your stand mixer. Cover and allow mixture to sit for about 5 minutes or until foamy on top.
Add the brown sugar, butter, vanilla extract, eggs, salt, cinnamon, nutmeg, allspice, and 1 cup (125g) flour. Using the dough hook or paddle attachment, mix on low speed for 30 seconds, scrape down the sides of the bowl with a rubber spatula, then add the remaining flour and the raisins. Beat on low speed until the dough comes together and pulls away from the sides of the bowl, about 2 minutes. Dough should be a little sticky and soft. If it’s too sticky and not pulling away from the sides of the bowl, mix in additional flour 1 Tablespoon at a time.
Keep the dough in the mixer and beat for an additional 5 full minutes, or knead by hand on a lightly floured surface for 5 full minutes. (If you’re new to bread-baking, my How to Knead Dough video tutorial can help here.) If the dough becomes too sticky during the kneading process, sprinkle 1 teaspoon of flour at a time on the dough or on the work surface/in the bowl to make a soft, slightly tacky dough. Do not add more flour than you need because you do not want a dry dough. After kneading, the dough should still feel a little soft. Poke it with your finger—if it slowly bounces back, your dough is ready to rise. You can also do a “windowpane test” to see if your dough has been kneaded long enough: tear off a small (roughly golfball-size) piece of dough and gently stretch it out until it’s thin enough for light to pass through it. Hold it up to a window or light. Does light pass through the stretched dough without the dough tearing first? If so, your dough has been kneaded long enough and is ready to rise. If not, keep kneading until it passes the windowpane test.
Lightly grease a large bowl with oil or nonstick spray. Place the dough in the bowl, turning it to coat all sides in the oil. Cover the bowl with aluminum foil, plastic wrap, or a clean kitchen towel. Allow the dough to rise in a relatively warm environment for 1-2 hours or until double in size. (I always let it rise on the counter. Takes about 2 hours. For a tiny reduction in rise time, see my answer to Where Should Dough Rise? in my Baking with Yeast Guide.)
Grease a 9×13-inch baking pan or two 9-inch square or round baking pans. You can also bake the rolls in a cast iron skillet or on a lined baking sheet.
When the dough is ready, punch it down to release the air. Divide the dough into 14-16 equal pieces. (Just eyeball it– doesn’t need to be perfect!) Shape each piece into a smooth ball, pinching it on the bottom to seal. I do this entirely in my hands and you can watch in the video above. Arrange in prepared baking pan.
Cover shaped rolls with aluminum foil, plastic wrap, or a clean kitchen towel. Allow to rise until puffy, about 1 hour.
Preheat oven to 350°F (177°C).
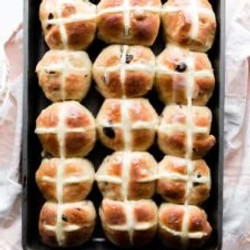
Whisk the cross ingredients together, starting with 6 Tablespoons of water. You want a thick paste that will pipe easily. Add remaining water if needed. Spoon paste into a piping bag or zipped-top bag. (No need to use a piping tip if using a piping bag.) Snip off a small piece at the corner. Pipe a line down the center of each row of buns, then repeat in the other direction to create crosses.
Bake for 20-25 minutes or until golden brown on top, rotating the pan halfway through. If you notice the tops browning too quickly, loosely tent the pan with aluminum foil. Remove from the oven and allow rolls to cool for a few minutes as you prepare the icing.
Whisk the icing ingredients together, then drizzle or brush on warm rolls. Serve immediately.
Cover leftover rolls tightly and store at room temperature for 1-2 days or in the refrigerator for up to 1 week.