 Sort ingredients
 icescreeamer
 QR Code
 Listen
 Pdf
Pdf
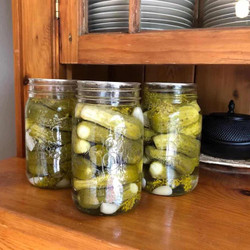
Soak cucumbers in ice water for no less than 2 hours, no more than 12 hours. (I soak mine in a cooler).
Prepare & sterilize your jars. Run them through the dishwasher on the sanitize cycle and keep the door closed so they stay hot. Alternatively, sterilize them by boiling them in hot water and then place them in a 175 degree oven to keep them hot. Follow your Ball canning book for instructions.
Prepare your ingredients: Peel and separate your garlic cloves, cutting large cloves in half. Wash your dill florets and if they are large, rip them into smaller pieces. Rub your cucumbers with your hands in the water to remove any dirt, then trim off ⅛" from the blossom end of the cucumber and place in a large bowl.
Make your brine: The ratio is 2 cups vinegar, 6 cups water, ⅓ cup pickling salt. You will multiply this by as much as will fit in your stock pot (I can fit 4x this ratio in my stock pot). Bring it to a rolling boil. And re-make it as you use it up.
Prepare your lids: In a sauce pan on the stove, bring your lids to a boil (make sure they're not stuck together), then reduce to a simmer and keep them hot.
Fill your jars: Do 2 jars at a time and keep the rest hot. Everything hot is the key to your lids sealing. Add items in the following order: 2 garlic cloves, 1 dill floret, cucumbers (as many as will fit in the jar - squish them down, they will float once you add the brine), then 2 more garlic cloves & 1 dill floret on top).
Add brine: Using a funnel & a ladle, fill your pickle jars to ½" headspace. De-bubble using a wooden bamboo skewer or a plastic utensil.
Wipe your rims with a clean, damp cloth
Apply your lids, then screw on your rings to fingertip tight.
Move your jars to sit undisturbed while they cool and seal. I put a blanket or tea towels on my kitchen table and set them on that.
Continue filling 2 jars at a time, as above, re-making your brine as necessary.
Once you have filled all your jars, let them sit overnight, undisturbed.
In the morning, remove your rings and check your seals by gently lifting up on the lid with your fingers. If the lid stays on, your jars are sealed, and are now shelf-stable. If you have any that didn't seal (it happens to the best of us!), place them in the refrigerator right away, and eat those ones first.
Wipe off your jars and label them with the date, and store in a cool, dry location in your home.
Re-make every year!