 Sort ingredients
 oncnawan
 QR Code
 Listen
 Pdf
Pdf
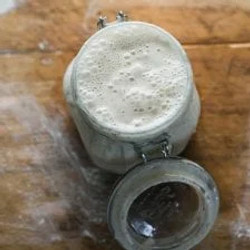
Combine 60 g (½ cup) of whole wheat flour + 60 g (¼ cup) of warm water in a large jar. Mix with a fork until smooth; the consistency will be thick and pasty.
Cover with plastic wrap, reusable wax wrap, or a lid and let rest in a warm spot, about 70-75 F for 24 hours. Temperature is important.
Total approximate yield: 120 g starter
DAY ONE
DAY THREE
Remove and discard half (60g) of your sourdough starter from the jar. To do so: use a spoon to scoop it out, or pour it directly into a bowl to weigh (you can also just eyeball the amount- it doesn’t have to be exact). The texture will be very stretchy.
To the jar: Add 60 g (½ cup) of all-purpose flour + 60 g (¼ cup) of water. Mix with a fork until smooth. Scrape down the sides with a small rubber spatular. The texture should resemble thick pancake batter or plain yogurt at this point.
Cover and let rest in a warm spot, 70-75 F for 24 hours.
Total yield: 180 g starter
DAY FOUR
Remove and discard half (90 g) of the sourdough starter.
To the jar: Add 60 g (½ cup) of all-purpose flour + 60 g (¼ cup) of water to the jar. Mix well. Scrape down the sides.
Cover and let rest in a warm spot, 70-75 F for 24 hours.
Total yield: 210 g starter
DAY FIVE
Remove and discard half (105 g) of the sourdough starter.
To the jar: Add 60 g (½ cup) of all-purpose flour + 60 g (¼ cup) of water. Mix well. Scrape down the sides.
Cover and let rest in a warm spot, 70-75 F for 24 hours.
Total yield: 225 g starter
DAY SIX
Remove and discard half (112 g) of the sourdough starter.
To the jar: Add 60 g (½ cup) of all-purpose flour + 60 g (¼ cup) of water. Mix well. Scrape down the sides.
Cover and let rest in a warm spot, 70-75 F for 24 hours.
Total yield: 232.5 g starter
DAY SEVEN
Remove and discard half (116.25) of the sourdough starter.
To the jar: Add 60 g (½ cup) of all-purpose flour + 60 g (¼ cup) of water. Mix well. Scrape down the sides.
Cover and let rest in a warm spot, 70-75 F for 24 hours.
Total yield: 236 g starter
DAY EIGHT
By now, your starter should have doubled in size. You should see plenty of bubbles, both large and small. The texture will be spongy, fluffy, and similar to roasted marshmallows (think: s’mores). It should smell pleasant, and not link stinky like gym socks. If these conditions are met, your starter is now active and ready to use!
Please keep in mind, if your starter is not ready at this point, which is quite common due to temperature issues (too cold), timing, and other factors, continue feeding it for 1-2 weeks or more. Be patient!
The very last step is to transfer your starter to a nice, clean jar. You only need to do this if your jar is crusty looking and needs a good wash. Then, in keeping with tradition, name your starter. My starter is called Dillon, after my oldest boy.
Wondering if your starter is ready to use?
When your starter is fully active, do the float test. Feed your starter, wait for it to double in size, and then drop a teaspoon of bubbly starter into a jar of water; if it floats to the top it’s ready to use.
STORAGE OPTIONS
If you bake often, store your starter at room temperature (feed it 1x-2x a day to keep it active). If you plan to bake only once in a while, store it in the fridge to preserve its strength (feed it 1x a week). When storing your starter in the fridge, there’s no need to bring it to room temperature first before feeding it. Just give it some flour and water and pop it back in the fridge.