Add the raw cashews to a mug and add very hot tap water over top, to cover. Allow that to soak for at least five minutes before using the cashews.
Bring a large pot of water to a boil over high heat. Add the elbow pasta. Reduce heat to medium and boil until tender.
While the pasta is boiling, you can whip up your cheese sauce.
First in a small pot or skillet, add the olive oil and turn heat to high. Add in the onion and garlic. Saute for 2 minutes to soften and caramelize the onions anbd brown the garlic. Transfer this mixture to a blender. With the skillet heat still on, add in the butternut squash. Cover with a lid and cook for 2 minutes, just until it is cooked through and soft. Frozen squash will cook more quickly than fresh squash. If you fresh squash cubes seem a bit dry, you can add a splash of broth to the skillet. When the squash is tender, transfer it to the blender.
Drain the cashews. They will not be fully plumped, but at least slightly softened from the five minutes of soaking.
Add to the blender: cashews, vegan butter, salt and pepper, nutritional yeast, cheese slices, broth, apple cider vinegar and the pasta water. The pasta water is just removed from the boiling pasta in the pot. Blend from low to high until silky smooth.
Preheat oven to 350 degrees.
Drain the pasta and add to a large mixing bowl. Pour the cheese sauce over top. Only add about three-fourths of the sauce quantity.
Pour the pasta into an 8-9" square or rectangle baking dish. Now you can pour the reserved sauce right over top, or leave it on the side to add as desired once the pasta is baked. I like to grind some fresh black pepper over top. You could also sprinkle red pepper flakes or even smoky paprika. If you want really super cheesy pasta, add a layer of vegan cheese shreds over top!
Cover pasta with foil and bake covered for 15 minutes at 350 degrees. Then remove the foil and bake for another 10 minutes, uncovered.
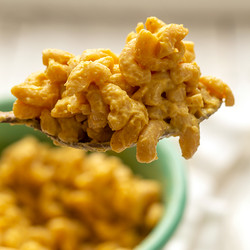
Serve warm! Add salt to taste. I sprinkled some right over top my pasta to serve. I liked being able to really taste that punch of sea salt; and I also like being able to control the salt per portion. Store leftovers in the fridge. This pasta is delicious the next day. Make-ahead approved.
