 Sort ingredients
 aaronsteele
 QR Code
 Listen
 Pdf
Pdf
Scrub the lemons clean: Discard any that are moldy or damaged.
Prepare the lemons: Cut ¼ inch off from the ends of the lemons. Working one at a time, stand a lemon on end. Cut the lemon in half lengthwise. Cut each lemon half into several segments, lengthwise. As you cut the lemons into segments, if you can, pull off any exposed membranes. Just get the ones that are easy to get to, ignore the rest. When you've cut down to the final segment, cut away the pithy core. Remove all seeds from the segments. Reserve the seeds and any removed membrane or pith. You will need them to make pectin. Cut each lemon segment crosswise into even pieces to make little triangles of lemon peel and pulp.
Put seeds, membranes, and pith into cheesecloth or muslin bag: Put all of the seeds, membranes and pith you removed from the lemons into a bag fashioned out of two layers of cheesecloth or a muslin jelly bag.
Boil until the peels are soft: Place the lemon segments and water into a large, wide pot. Place the pectin bag in the pot with the fruit pulp and tie it to the pot handle. Place the pectin bag in the pot with the fruit pulp and secure to the pot handle. Bring to a strong boil on high heat. Let boil, uncovered, for about 25-35 minutes, until the peels are soft and cooked through. (If too much of the water evaporates from the boil and the peels start sticking to the bottom of the pan, add a little more water back in.) Test one of the lemon peel pieces by eating it. It should be very soft. If it is still chewy, keep cooking until soft. Remove from heat.
Remove the pectin bag: Remove the pectin bag and place it in a bowl. Let cool until it is comfortable to touch.
Squeeze the pectin from the bag: Once your pectin bag has cooled to the point you can handle it, if you want, squeeze it like Play-doh to extract any extra pectin. This is not necessary but will help ensure a good set. (I like to wear disposable gloves for this part.) You should be able to get a teaspoon or two more from the bag. It has the consistency of sour cream. Return this pectin to the pan with the lemon mixture.
Add the sugar: Measure out your sugar and add it to the pan.
Boil and and check the temperature: Heat the mixture on medium high and bring it to a rapid boil, stirring occasionally, making sure nothing is sticking to the bottom of the pan. After the marmalade first comes to a boil, it will foam up considerably. This is why you need need to use a large pot, and make sure you pay attention and keep your eyes on the whole process. Stir with a wooden spoon to bring the foam back down. If it gets too high, lower the temperature to keep it from overflowing the pot. Secure a candy thermometer to the side of the pan, or check the jelly temperature with an instant read thermometer. The marmalade may take anywhere from 20 to 35 minutes or so to be ready to pour out. After about 15 minutes, start checking the temperature frequently.
Test for the gelling point: There are two ways to test that the marmalade is ready to pour out into jars: the mixture reaching a temperature of 218 to 220°F (6-8°F above the boiling point at your altitude) OR putting a bit of it on a chilled plate "wrinkling up" when you push it with your finger tip. I steer off of the wrinkle test. If the sample of jelly wrinkles, it's ready. I use a thermometer just to help me gauge when to do the wrinkle test. For the wrinkle test, place a small plate into the freezer. As the jelly temperature reaches 217°F, start testing it by placing a small amount of the hot jelly on the chilled plate. If the jelly spreads out and thins immediately, it isn't ready. If it holds its shape a bit, like an egg yolk, that's a good sign. Push up against it with your finger tip. If the jelly sample wrinkles at all, it is time to take the jelly off the heat and pour it out into jars. When you use a candy thermometer or an instantread thermometer to test the temperature of your mixture, make sure the probe is NOT touching the bottom of the pan. Make sure that the indentation on the probe (with modern candy thermometers this is about an inch and a half from the bottom of the probe) is actually surrounded by the mixture. This may mean that you have to tilt the pan to one side, to cover the probe sufficiently to get a good reading.
Sterilize canning jars: While the marmalade is in its second cooking stage, sterilize your jars using your preferred method. This not only sterilizes the jars, but it helps to keep them from cracking from the temperature differential when you add the hot marmalade. Wash the lids in hot, soapy water.
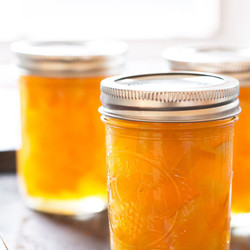
Ladle the marmalade into the sterilized jars: Once the jelly has reached 218-220°F or its "wrinkly" stage, remove the jelly pot from the heat. Carefully ladle the jelly into the jars, leaving ¼ inch of head space at the top of the jars.
Clean rims, secure with lids and jar ring: Wipe the rims clean with a clean, wet paper towel. Place the clean, dry lids on the jars, securing with jar rings until they are fingertip-tight. Work quickly.
Allow the jars to cool and seal: Allow the jars to sit overnight. You will hear them make a popping sound as a vacuum seal is created. Even if the jelly is not firm as it goes into the jar (it shouldn't be), it should firm up as it cools.