Place 700ml water into your mixing bowl.
Put 10g of fresh yeast into the water and assist it to dissolve with one of your hands by mixing it into the water. I only use my right hand to mix this and keep my left hand free (you will see how much this will help you very soon!).
Continue to mix the yeast in the water with your hand until it dissolves completely.
Now, add sifted flour to the bowl. Don’t put all of it in the bowl! Keep a small portion of the flour to the side as you will need it later on…
For a touch of seasoning, add 50g of table salt and a touch of pepper.
Using one hand only once again, mix the ingredients together and remember, don’t squash your dough, mix it!! Start by cupping part of the mixture and turning it back in to the remaining flour while rotating the bowl, bit by bit. This can get pretty technical but have fun mixing and getting to know the dough.
If you prefer using a mixer, you can, but I really believe that the best bread dough is made using the traditional mixing method, your hands!
Continue to mix it until there is no more flour left and if you have one, try to move it onto the bench.
And now? The best part! Use your hands and get to know the dough.
Your dough will more than likely still be a little too soft, and you know need to now add some of the left over flour.
To do this, put some flour and your hands and rub them together on top of the dough. This will help to make the dough dry, get rid of the flour which is stuck to your hands as well as begin to harden the dough.
Now, mix your dough using one hand at a time, while it continues to soften.
At this point if it is too soft, add a small amount of flour and if it is too hard add a tiny bit of water (but not too much!).
Begin to massage the dough, pressing quite hard. You can even punch it if you like! You really want a nice dough that moves with you so keep pressing and make sure there is no air in the dough.
Now that it is getting stronger, punch it a little more and it should make the bread dough nice and hard.
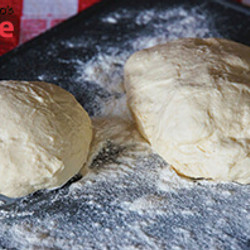
By this stage, the bread dough should have formed into a nice ball and have a pretty smooth texture.
To finish the dough, you will need to place it on a large wooden board or even your kitchen bench. It is best to use something wooden as the dough will still be quite sticky and it will get stuck on other materials.
Now, using both hands, press down on the dough, one at a time and then with both hands. Repeat this and you will notice that the texture continues to change, it will gradually become smoother and more stretchy.
Again, punch it a few times to get the air out – this is why it’s better to use your hands and not a machine – it can even help with stress!
You will need to massage the bread dough for about 15 minutes in total.
Now, mould the dough into a little ball and place it back in the bowl.
It’s time to now pour a very small portion of extra virgin olive oil over the dough (less than a tablespoon) and spread the oil over the dough with your hands until you have covered every part of it.
Now get your wet tea towel and place it over the top of your bowl which contains the dough. Make sure there are no gaps or holes letting air in, and put it in the fridge.
The bread dough should be in the fridge for around 20-24hr if you want the best results so it’s best to make this at least the day before.
Once you are ready to make your meal, get the dough out of the fridge make sure you massage the dough once again and then:
FOR BREAD:
Divide the dough by pulling a chunk off, stretching it slightly, and then moulding it into a longish, oval-like shape. This should weigh between 400-450grams.
This should be placed onto a flat tray which has some flour sprinkled at the bottom of it, so that the dough does not stick.
Then, it should rest for 15 minutes before you roll it out a little more.
This dough will stay fresh for around a week so you can be creative and make whatever you like!
E ora si mangia, Vincenzo’s Plate….Enjoy!
