Dry skin overnight: Place pork belly on a plate. Pat skin dry with paper towels. Leave uncovered in fridge overnight to dry out the skin. (If you don't have time, pat the skin dry as best you can).
Preheat oven to 140°C/285°F (120°C fan).
Season flesh: Drizzle flesh (only) with 1 tsp oil. Sprinkle over ½ tsp salt, the pepper and fennel powder. Rub all over the flesh, including on the sides, being sure you get right into all the cracks and crevices.
Wrap in foil: Place 2 pieces of foil on a work surface. Put the belly in middle of foil, skin side up. Fold the sides in to enclose the belly, forming an open box, pinching corners to seal tightly and make it as snug as possible. Place meat on a tray.
Season skin: Pat skin dry with paper towels. Rub with ½ tsp oil then sprinkle remaining ½ tsp salt evenly all over the skin surface, from edge to edge.
Slow roast 2 ½ hours: Place in the oven and roast for 2 ½ hours. After 1 ½ hours, remove and tighten the foil (pork will have shrunk), and continue cooking. This keeps the pork fat level up as high as possible, and the flesh protected so it stays moist.
Increase heat: Remove pork from oven, then increase heat to 240°C/465°F (all oven types).
Level pork: Remove pork from foil and place on a rack set over a tray (using rack is best, but optional). Use scrunched up balls of foil stuffed under pork to prop up so the skin surface is as level and horizontal as possible (see photos in post).
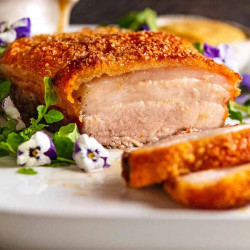
30 minutes on high heat! Place the pork back in the oven for 30 minutes, rotating after 15 minutes as needed, until the crackling is deep golden, puffy and crispy all over. If some patches are browning faster, protect with foil patches.
Rest 10 minutes: Remove pork from oven. Rest for 10 minutes before slicing.
Serving: Slice into 2cm / ⅘"-thick slices using a serrated knife. Pictured in post with Apple Sauce and Vermouth Jus, with a side of Cauliflower Puree (Note 2)! See directions in post for how to plate it up as pictured (fine dining style!), as well as a list of more sauce options.
