 Sort ingredients
 pdoyle10
 QR Code
 Listen
 Pdf
Pdf
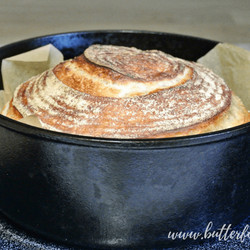
Learn how to bake a big and beautiful loaf of real sourdough bread. This formula yields a soft and pillowy crumb perfect for slathering with real butter!
Weigh all ingredients in a glass or ceramic bowl.
Mix the ingredients into a loose shaggy dough with a wooden spoon or dough whisk.
Wet your hands and gently knead the dough in the bowl by hand until it comes together with no excess flour.
Let the dough rest covered for 10 to 15 minutes.
Start the first stretch and fold by wetting your hands and lifting one side of the dough and folding it toward the middle. Repeat this stretch and fold process in all four directions.
Sometimes you can get away with an extra one or two folds depending on the elasticity of the dough. If it wants to stretch, stretch it! If it's tearing or breaking, it needs a rest.
Let the dough rest for 10 minutes.
Start the second stretch and fold by wetting your hands and repeating the same folding motion in (at least) all four directions.
Let the dough rest for 10 minutes.
Repeat the stretch and fold and resting process up to five more times for a total of seven stretch and folds (or as many as you are able). I have made great bread by just doing two stretch and folds. But remember, the more stretching and folding, the more gluten will develop, and the higher your bread will rise!
After the last stretch and fold cover the dough and allow it to double in size. This can take anywhere from 3 to 6 hours depending on starter strength and ambient temperature.
Prepare your banneton (proofing basket) with a coating of flour. My trick is to use sprouted wheat flour. Sprouted wheat does not develop gluten so it will keep the bread from sticking to the basket. Rice flour, buckwheat, or other non-glutinous flour can also be used.
Working with the doubled dough, start the final stretch and fold. This will act as the "punch down" of the dough, deflating the gasses trapped inside the gluten network. Stretch the dough several times toward the center, each time pressing down on the dough to remove air bubbles.
Let the dough rest for 10 minutes.
Lightly wet your hands and remove the dough from the proofing bowl onto your work surface. Shape the dough by repeating the same folding toward the center action. Once a tight ball is achieved flip it seam side down and push it gently in all directions across the work surface to build tension in the outer layer (see attached video).
Let the dough rest seam side down for 5 minutes.
Transfer the dough to the banneton basket. This time you want the seam to be up and the tight surface to be down in the basket.
Sprinkle the seam side of the shaped dough with a light dusting of flour and cover it securely with wrap and a rubber band.
Place the banneton basket in the refrigerator overnight for at least 10 hours. 12 to 24 hours is my preferred proofing time.
Once the dough has crested the edge of the banneton it is ready to bake, but you may keep it in the refrigerator for a longer period of time.
Preheat your oven to 450°F with your covered Dutch oven inside.
Cut a piece of parchment paper big enough to overhang your loaf's circumference by a few inches.
Remove the banneton from the refrigerator, remove the wrap from the dough, and place the parchment sheet over the exposed dough. Hold the parchment in place with your hand while you flip the dough onto the counter. Now the parchment is on the bottom.
Carefully ease the banneton off the dough. Sometimes it takes a little coaxing. Use your fingers to gently work between the dough and basket. Hopefully the basket will lift away clean!
Using a sharp razor blade, score the dough along the top. There are so many scoring patterns to practice with, but a good one to start with is a simple slash or a cross. Score the dough about ½ inch deep.
Using baking gloves, remove the Dutch oven from the oven and remove the lid.
Working quickly, pick up the boule by the parchment paper edges and place it into the Dutch oven on top of the parchment.
If desired, add a few ice cubes to the Dutch oven between the parchment and the wall of the Dutch oven, or spray the boule with a few spritzes of filtered water. Adding additional moisture will keep the crust soft, allowing for more rise and giving a nice blistered texture and appearance.
Cover the Dutch oven and place it back in your preheated oven. Bake undisturbed for 25 minutes.
Open your oven and remove the Dutch oven lid. Bake for an additional 15 minutes.
Remove your Dutch oven from the oven and gently lift the boule out using the parchment paper as handles. Remove the parchment paper and cool the boule on a wire rack. Cool the boule completely before cutting (possibly the hardest part of baking this incredible loaf of bread!).