 Sort ingredients
 tjlydonjr
 QR Code
 Listen
 Pdf
Pdf
Day 1, sort out any foreign objects in the beans. Rinse well and soak them overnight.
Day 2, dump the soaking water, and rinse thoroughly. Transfer the beans to a pot and cover them with filtered water. Cook on medium heat with a lid covered but leave a small crack. Watch it closely during this time as it can overflow very easily. Skim the foam off if you like, then continue to cook it covered. Add more water if needed, turn the heat down a little bit, and continue to cook until they are soft and easily smashed with your fingers. Note: drain the excess water if you have too much left after the beans are soft.
Let them cool to body temperature, then add vinegar followed by the tempeh starter. Mix thoroughly, and transfer it equally to glass containers. Lightly pack and level off the surface. Put the container in a box, cover them with a damp-warm cloth, then loosely close the container’s lid.
Day 3 until done, dampen the cloth once a day and put it back in–2 times a day is ok too.
By Day 4, you see some mold start to grow.
Day 5, it should be covered with more mold. You can stop it at this point, but I like to let the mold to grow thicker for another day.
Day 6, the beans are all covered with the white mold. Note: You can use it now, but it’s still soft and not easy to cut. It’s better to let it rest in the fridge for another day before using it.
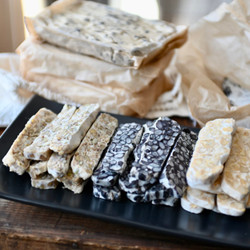
Take it out of the container. Wrap it with parchment paper, and store it in a cloth bag or breathable container. Let it rest in the fridge for one night before eating it. Reuse the paper if you can.
After being in the fridge for one night, it gets firmer and easier to cut. Now you can use it with any recipes that require tempeh. It stays fresh for a week.