 Sort ingredients
 willa
willa QR Code
 Listen
 Pdf
Pdf
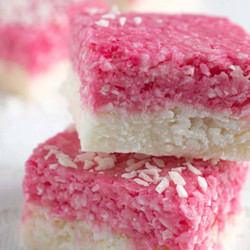
Line a 20cm x 20cm (8" x 8") baking tray with parchment paper. If you want thicker slices, you can use a smaller tray. We would not advise using a larger sized tin than 20cm x 20cm (8" x 8") as the coconut ice slices will be too thin. Top tip: It helps to leave a slight overhang of paper, that way you can lift the entire slab of coconut ice out of the baking tray much easier later on.
In a large bowl, add all the ingredients except for the food colouring.
Start by combining the mixture with a large spoon. The mixture may seem stiff and dry but don't worry, it will come together.
Put the spoon aside and dive in with your hands to bring the mixture together. No need to be gentle - this step requires a bit of elbow grease. Get in there and really squish the mixture together.You can use rubber gloves if you don't want the mixture on your hands.
Divide the mixture in two. If you want an accurate split between the pink and white layers you can weigh each half.
Take the one half of the mixture and divide it into smaller pieces, then arrange them across the bottom of the baking tin. Use your fingertips to press the mixture firmly into the bottom of the tin, ensuring an even spread.Use a metal spoon to smooth the layer out.
Add a small amount of pink food colouring to the remaining half of the mixture.
Get hands-on and thoroughly work the colouring into the mixture. Don't hold back - give it a good squish to ensure an even colour distribution.
Similar to the white layer, distribute small pieces of the pink mixture over the surface. Handle it with a bit more gentleness this time, spreading it evenly and smoothing it out using the back of a clean metal spoon.
Cover the coconut ice with cling film and place the tin in the fridge for a minimum of 6 hours to allow it to set.
Once set, carefully lift the entire block of coconut ice from the tin onto a cutting board. Slice it into small squares or any desired shape.